Apex Legends 2026: Advanced Movement Guide - Master Wall Jump, Slide Hop, Bunny Hop, and Tap Strafing
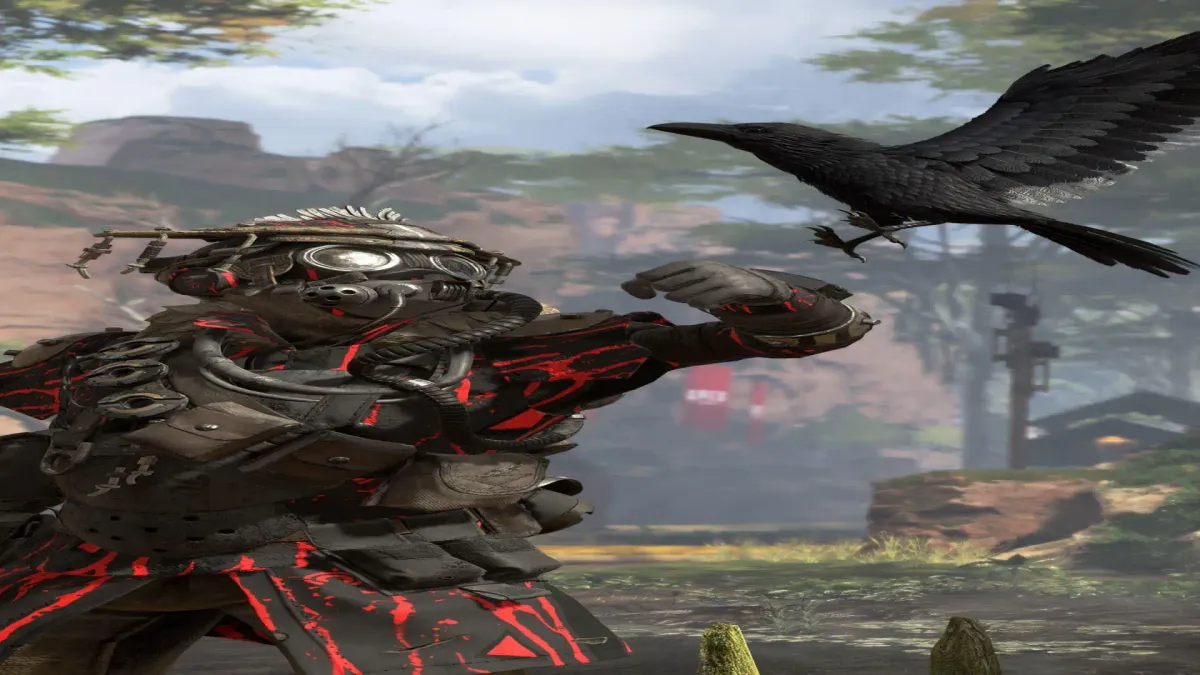
Movement is the heart of Apex Legends! With over 100 million players worldwide and a thriving competitive scene, mastering advanced movement techniques separates good players from great ones. This comprehensive guide will teach you everything from basic movement to pro-level mechanics like wall jump, slide hop, bunny hop, tap strafing, and superglide.
Whether you’re climbing ranked from Bronze to Predator or competing in tournaments, these movement techs will give you the edge in gunfights, rotations, and outplays. Let’s dive into the mechanics that define Apex Legends’ high-skill ceiling!
Why Movement Matters in Apex Legends
Competitive Advantage
Gunfight Dominance:
- Unpredictable movement makes you harder to hit
- Strafe patterns confuse enemy aim assist
- Quick repositioning wins 1v1 trades
- Movement techs create outplay opportunities
Map Mobility:
- Faster rotations to zone
- Better high ground access
- Escape dangerous situations
- Flank positioning for team fights
Skill Expression:
- Movement techs separate ranks
- Pro players use advanced mechanics
- Mechanical skill translates to wins
- High movement APN (actions per minute) = better performance
Movement Meta in Season 2026
Current State:
- Movement techs remain core to gameplay
- No major nerfs to slide/wall mechanics
- Competitive scene emphasizes movement
- Ranked meta rewards aggressive positioning
Legend Synergies:
- Octane: Jump pad + speed boost combos
- Pathfinder: Grapple + wall bounce
- Wraith: Portal + movement techs
- Bangalore: Smoke + strafe patterns
Basic Movement Fundamentals
Sprint and Slide Mechanics
Basic Sprint:
- Hold sprint button (default: Shift on PC)
- Movement speed: 6m/s base speed
- Sprint drains stamina meter
- Can’t shoot while sprinting
Slide Mechanics:
- Crouch while sprinting to slide
- Slide duration: ~1.3 seconds
- Slide speed: faster than sprint
- Can shoot while sliding (accuracy penalty)
Slide Jump:
- Jump at end of slide for distance boost
- Timing: jump just before slide ends
- Distance: 15-20 meters with proper timing
- Essential for all advanced techs
Crouch Spam in Gunfights
Crouch Spam Technique:
- Rapidly tap crouch during gunfight
- Makes head hitbox smaller
- Unpredictable movement pattern
- Combine with strafe for maximum effectiveness
Timing Patterns:
- Random crouch timing (unpredictable)
- Crouch on enemy shot (dodge)
- Crouch while reloading (safe)
- Crouch when peeking corners
Crouch Cancel:
- Cancel reload animation with crouch
- Faster return to shooting
- Risk: can’t shoot during cancel
- Use when safe from immediate threat
Strafe Patterns
Linear Strafe:
- Move side to side in straight line
- Easy to track for good aimers
- Use for long range engagements
- Combine with crouch for difficulty
Circular Strafe:
- Move in circular pattern around enemy
- Harder to track than linear
- Use in close range fights
- Maintain distance while circling
Random Strafe:
- Unpredictable direction changes
- Most difficult to track
- Use in 1v1 duels
- Requires good game sense
Advanced Movement Techniques
1. Wall Jump (Wall Bounce)
What is Wall Jump:
- Slide hop into wall, then jump off
- Gains height and distance
- Resets slide cooldown
- Essential for vertical mobility
Execution Steps:
- Sprint toward wall at 45-degree angle
- Slide jump into wall (slide + jump)
- As you approach wall, turn perpendicular
- Jump at the moment of impact
- You’ll bounce off wall with height boost
Timing Window:
- Jump within 0.2 seconds of wall contact
- Too early = normal jump
- Too late = no bounce
- Practice in Firing Range for muscle memory
Advanced Applications:
- Wall bounce for high ground access
- Escape ganks with wall jump
- Reposition in team fights
- Chain multiple wall bounces for distance
Legend Synergies:
- Octane: Wall jump + jump pad combo
- Pathfinder: Grapple to wall + wall bounce
- Wraith: Portal escape with wall jump
- All legends: Universal tech
2. Slide Hop (Slide Jump)
What is Slide Hop:
- Jump at end of slide for distance boost
- Maintains momentum from slide
- Foundation for advanced techs
- Essential movement skill
Execution Steps:
- Sprint forward
- Crouch to initiate slide
- Wait for slide near end (~1 second)
- Jump at slide completion
- You’ll travel farther than normal jump
Timing Window:
- Jump in last 0.3 seconds of slide
- Optimal: 0.1 seconds before slide ends
- Early jump = reduced distance
- Late jump = no boost
Distance Gained:
- Normal jump: ~4 meters
- Slide hop: ~12-15 meters
- Distance varies by angle and timing
- Practice for consistency
Combat Applications:
- Quick repositioning in fights
- Dodge skill shots with slide hop
- Rotate through map faster
- Chain slide hops for speed
3. Bunny Hop (Bhop)
What is Bunny Hop:
- Continuous jump-hops for speed maintenance
- Preserves momentum from previous jump
- Faster than normal running
- Requires precise timing
Execution Steps:
- Gain initial speed (sprint or slide)
- Jump forward
- Land and immediately jump again
- Continue jump chain without stopping
- Maintain forward momentum
Timing Window:
- Jump the moment you land
- No delay between jumps
- Look down slightly for better timing
- Rhythm: jump-land-jump-land
Speed Comparison:
- Walking: 3m/s
- Sprinting: 6m/s
- Bunny hop: 7-8m/s (with good timing)
- Speed increases with practice
Advanced Variations:
- Circle Strafe Bhop: Bunny hop while circling
- Wall Bhop: Bunny hop off walls
- Crouch Bhop: Add crouch for unpredictability
- Weapon Bhop: Maintain accuracy while hopping
Console Execution:
- Use scroll wheel bind for auto-jump
- Bind jump to scroll down (continuous)
- Hold forward + scroll for bhop
- Less precise than PC but viable
4. Tap Strafing
What is Tap Strafing:
- Change direction mid-air with crouch taps
- Redirect momentum without landing
- Unique to Apex Legends
- High skill ceiling tech
Execution Steps:
- Gain air time (jump, slide hop, or fall)
- While airborne, hold strafe direction
- Rapidly tap crouch 5-7 times
- You’ll redirect momentum 90 degrees
- Land in new direction
Timing Window:
- Tap crouch 5-7 times rapidly
- Must be in air (not grounded)
- Hold strafe direction throughout
- Practice tap rhythm for consistency
Directional Control:
- Hold left strafe = turn left
- Hold right strafe = turn right
- Hold forward = maintain forward
- Combine for complex paths
Combat Applications:
- Dodge sniper shots mid-air
- Reposition during fall
- Unpredictable landing position
- Escape third parties with tap strafe
PC vs Console:
- PC: Easier with keyboard (multiple crouch binds)
- Console: Possible with controller but harder
- PC tap rate: 10+ taps per second
- Console: 5-7 taps with practice
Advanced Techniques:
- Double Tap Strafe: Two tap strafes in one jump
- 180 Tap Strafe: Complete direction reversal
- Vertical Tap Strafe: Gain height with timing
- Weapon Swap Strafe: Maintain readiness
5. Superglide
What is Superglide:
- Slide + crouch cancel for speed boost
- Faster than normal slide
- Maintains crouch hitbox
- Controversial but legal tech
Execution Steps:
- Sprint forward
- Initiate slide (crouch while sprinting)
- Immediately cancel slide with crouch
- You’ll maintain slide speed in crouch
- Can shoot while supergliding
Timing Window:
- Cancel slide within 0.1 seconds
- Crouch immediately after slide start
- Practice for muscle memory
- Window is very tight
Speed Comparison:
- Normal slide: ~8m/s
- Superglide: ~9m/s
- Speed boost: ~12% faster
- Stacks with other movement buffs
Combat Applications:
- Fast rotations with superglide
- Smaller hitbox (crouch) while moving fast
- Can shoot during superglide
- Combine with slide hop for distance
Controversy Status:
- Legal in competitive play
- Not patched by Respawn
- Some players consider “cheese”
- Widely used in ALGS tournaments
Advanced Variations:
- Superglide Jump: Superglide + slide hop
- Superglide Strafe: Add strafe patterns
- Superglide Crouch: Maintain crouch throughout
- Superglide Reload: Reload during superglide
6. Fatigue Wall Bounce
What is Fatigue Wall Bounce:
- Wall bounce after stamina depletion
- Uses fatigue mechanic for height
- Advanced Octane/Pathfinder tech
- Niche but powerful
Execution Steps:
- Deplete stamina (sprint until exhausted)
- Slide toward wall while fatigued
- Wall jump as normal
- Fatigue adds extra height
- Landing resets stamina
Timing Window:
- Must be fatigued (stamina empty)
- Wall jump timing same as normal
- Fatigue bonus: +20% height
- Situational but powerful
Best Legends:
- Octane: Stim depletes stamina intentionally
- Pathfinder: Grapple depletes stamina
- Bangalore: Passive sprint for fatigue
- All legends: Universal but situational
7. Zip Line Techs
Zip Line Jump:
- Jump off zip line mid-travel
- Maintains momentum from zip line
- Redirect with tap strafe
- Unexpected engagement angle
Zip Line Dismount:
- Dismount early for positioning
- Slide hop on dismount for distance
- Crouch for smaller hitbox
- Shoot while dismounting
Legend-Specific Movement Techs
Octane Movement
Stim + Slide Combo:
- Pop stim for 30% speed boost
- Slide hop with stim active
- Chain slide hops for maximum speed
- Health cost: 20 HP per stim
Jump Pad Combos:
- Slide hop onto jump pad
- Jump pad + wall bounce
- Jump pad + tap strafe
- Team jump pad chains
Speed Record:
- Stim + superglide + slide hop chain
- Fastest rotation in game
- Health management crucial
- Best for aggressive plays
Pathfinder Movement
Grapple + Wall Bounce:
- Grapple to wall
- Wall bounce on arrival
- Chain grapples for distance
- Vertical mobility king
Grapple + Tap Strafe:
- Grapple swing
- Tap strafe mid-swing
- Redirect momentum
- Unpredictable landing
Zipline Master:
- Fast zipline travel
- Zipline jump ganks
- High ground zipline control
- Team zipline setups
Wraith Movement
Portal + Movement:
- Portal escape with wall jump
- Portal + slide hop engage
- Portal reposition in fights
- Team portal rotations
Void + Movement:
- Void reposition + wall bounce
- Void dodge + tap strafe
- Void escape + slide hop
- Invulnerability during techs
Bangalore Movement
Smoke + Strafe:
- Smoke cloud for cover
- Strafe patterns in smoke
- Unpredictable movement
- Blind enemy aim
Passive Sprint:
- Double sprint when shot at
- Stim + passive speed
- Slide hop with speed boost
- Kiting with passive
Movement Training Routine
Daily Practice (30 minutes)
Firing Range Drills (15 minutes):
Wall Jump Practice:
- 5 minutes: Basic wall jump repetition
- Target: 20 successful wall jumps
- Focus: Consistent timing
- Progress: Chain multiple bounces
Slide Hop Practice:
- 5 minutes: Slide hop distance training
- Target: 15-meter consistent distance
- Focus: Optimal timing window
- Progress: Moving slide hops
Bunny Hop Practice:
- 5 minutes: Bhop chain maintenance
- Target: 10 consecutive hops
- Focus: Rhythm and timing
- Progress: Bhop with weapon ready
Advanced Tech Practice (15 minutes):
Tap Strafing:
- 5 minutes: Air tap strafe repetition
- Target: 90-degree redirect consistency
- Focus: Crouch tap rhythm
- Progress: 180-degree tap strafes
Superglide:
- 5 minutes: Superglide timing
- Target: Consistent superglide execution
- Focus: Tight timing window
- Progress: Superglide + slide hop
Combo Execution:
- 5 minutes: Tech combinations
- Examples: Wall jump + tap strafe
- Focus: Smooth transitions
- Progress: Chain 3+ techs
Weekly Goals
Mechanic Mastery:
- Week 1: Wall jump + slide hop
- Week 2: Bunny hop + tap strafe
- Week 3: Superglide + fatigue bounce
- Week 4: Legend-specific combos
Application Training:
- Week 1: Firing range only
- Week 2: Unranked matches
- Week 3: Ranked games
- Week 4: Competitive focus
VOD Review:
- Record movement attempts
- Review successful techs
- Identify failed executions
- Track improvement weekly
Pro Player Learning
Watch Pro Streams:
- ALGS tournament VODs
- Pro player Twitch streams
- Movement-focused content
- Analyze tech usage
Key Players to Study:
- ImperialHal: Strategic movement
- Reps: Mechanical outplays
- Verda: Aggressive slides
- Zer0: Tap strafe mastery
Learning Focus:
- Note tech usage in fights
- Track rotation patterns
- Analyze escape mechanics
- Study engage angles
Common Mistakes and Fixes
Timing Errors
Wall Jump Too Early:
- Symptom: Normal jump height
- Fix: Wait for wall contact
- Drill: Practice in Firing Range
- Cue: Visual wall proximity
Wall Jump Too Late:
- Symptom: No bounce, just climb
- Fix: Jump at moment of impact
- Drill: Slow-motion practice
- Cue: Character animation
Bhop Broken Rhythm:
- Symptom: Speed loss between hops
- Fix: Jump on landing (no delay)
- Drill: Metronome timing
- Cue: Sound of landing
Tap Strafe Insufficient Taps:
- Symptom: Minimal redirect
- Fix: 5-7 rapid crouch taps
- Drill: Finger speed training
- Cue: Count taps aloud
Positioning Errors
Overcommitting with Movement:
- Symptom: Out of position after tech
- Fix: Plan landing zone
- Drill: Intentional landing practice
- Cue: Mini-map awareness
Predictable Patterns:
- Symptom: Enemy tracks your movement
- Fix: Vary tech usage
- Drill: Random pattern training
- Cue: Mix up strafe directions
Tech Usage in Wrong Scenarios:
- Symptom: Failed escape or engage
- Fix: Assess situation first
- Drill: Scenario-based practice
- Cue: Team positioning check
Hardware Considerations
PC Settings:
- Keybind crouch to multiple keys
- Bind jump to scroll wheel (bhop)
- Adjust FOV for better awareness
- 144Hz+ monitor for visual clarity
Controller Settings:
- Crouch to L3 or R3
- Jump to face button
- Adjust stick sensitivity
- Consider claw grip for techs
Performance Optimization:
- Stable FPS for consistent timing
- Low input lag for tech execution
- Wired connection for latency
- Close background apps
Movement in Different Game Phases
Early Game (Drop Phase)
Hot Drop Movement:
- Slide hop for weapon rush
- Wall jump for building access
- Bhop for rotation speed
- Aggressive movement for kills
Landing Priority:
- High ground with wall jumps
- Building access with wall bounces
- Weapon proximity with slide hops
- Team grouping with movement techs
Mid Game (Rotation Phase)
Zone Rotation:
- Superglide for fast rotation
- Slide hop chains for distance
- Wall jumps for high ground
- Bhop for consistent speed
Positioning:
- High ground with wall techs
- Flank angles with tap strafe
- Safe rotations with movement
- Team sync with movement calls
Late Game (Final Circles)
Final Circle Movement:
- Unpredictable strafe patterns
- Crouch spam in open fields
- Wall jumps for building plays
- Tap strafe for dodge
1v1 Movement:
- Bhop for kiting
- Slide hop for engage
- Wall jump for outplay
- Tap strafe for dodge
Team Fight Movement:
- Coordinated engages
- Movement calls for team
- Reposition with techs
- Escape with movement
Conclusion
Movement is what separates Apex Legends from other battle royales! Mastering wall jump, slide hop, bunny hop, tap strafing, and superglide gives you the mechanical edge to dominate gunfights, outplay opponents, and climb ranked ladder.
The key to improvement is consistent practice. Dedicate time daily in Firing Range, apply techs in unranked matches, then bring them to ranked play. Watch pro players, analyze their movement, and incorporate into your own style.
Need Apex Coins for new skins, battle pass, or legend unlocks? Top up at ItemGame - cheapest prices and instant processing for Apex Legends!
Remember: Movement is a skill, not talent. Practice makes perfect. See you in Predator lobby!